The Irrigation Setup in my New Veggie Garden
I’ve just finished putting together our veggie garden and it was one of the most rewarding and surprisingly easy weekend projects I’ve done.
I’ve always liked the idea of growing (some of) my own food and it would be nice to save a little money each week. I’m also excited at the prospect of not having to buy plastic-wrapped herbs and salad veggies from the grocery store anymore. Though at the time of posting this, a grasshopper has helped itself to my kale and coriander, so I’ll see how we go!
I’m starting small, growing only what I know we’ll eat each week to avoid wasting food and sticking to growing small easy plants like herbs and leafy greens.
How to Start a Veggie Garden
I have a checklist of what my ideal garden would look like:
- Portable – we live in a rental property so raised beds with a bottom that can be moved when needed
- Water-saving – Queensland is drought-prone so saving water is a priority so we went with a simple irrigation system on a timer
- Easy to maintain – growing plants that you snip what you need without having to plant new ones or maintain seeds
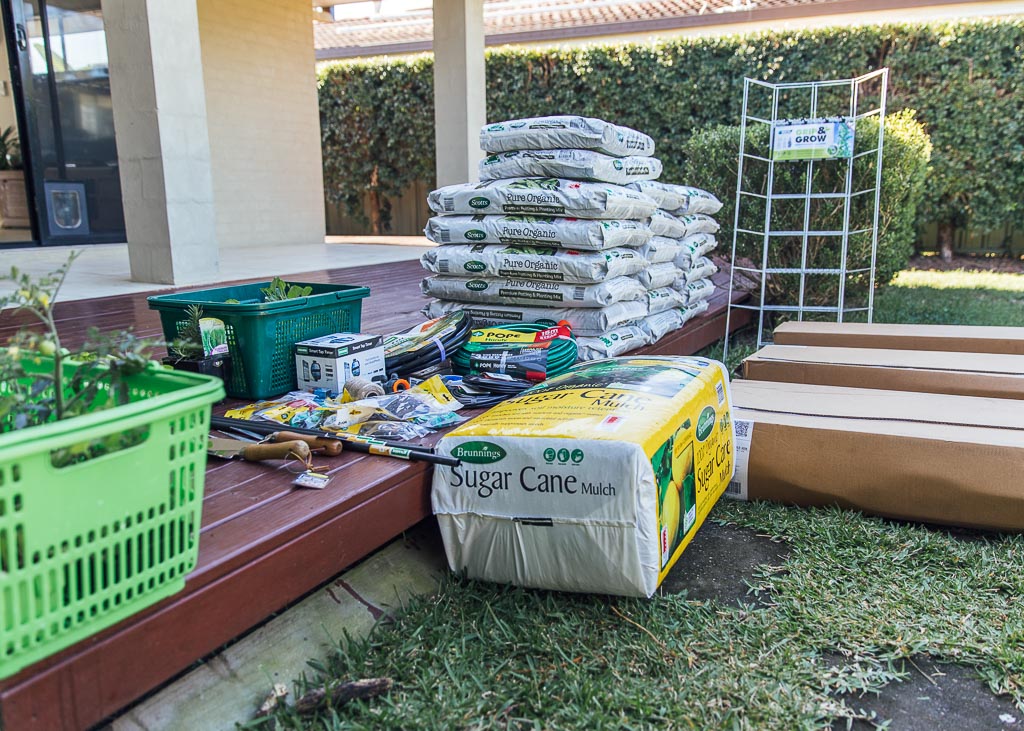
Everything needed to create this garden is from Bunnings. I used the wishlist function online, which I printed out to take in-store to save time. It made finding everything so much easier especially as the irrigation setup has lots of small parts.
All the bits and pieces below and I’ve linked everything we used throughout.
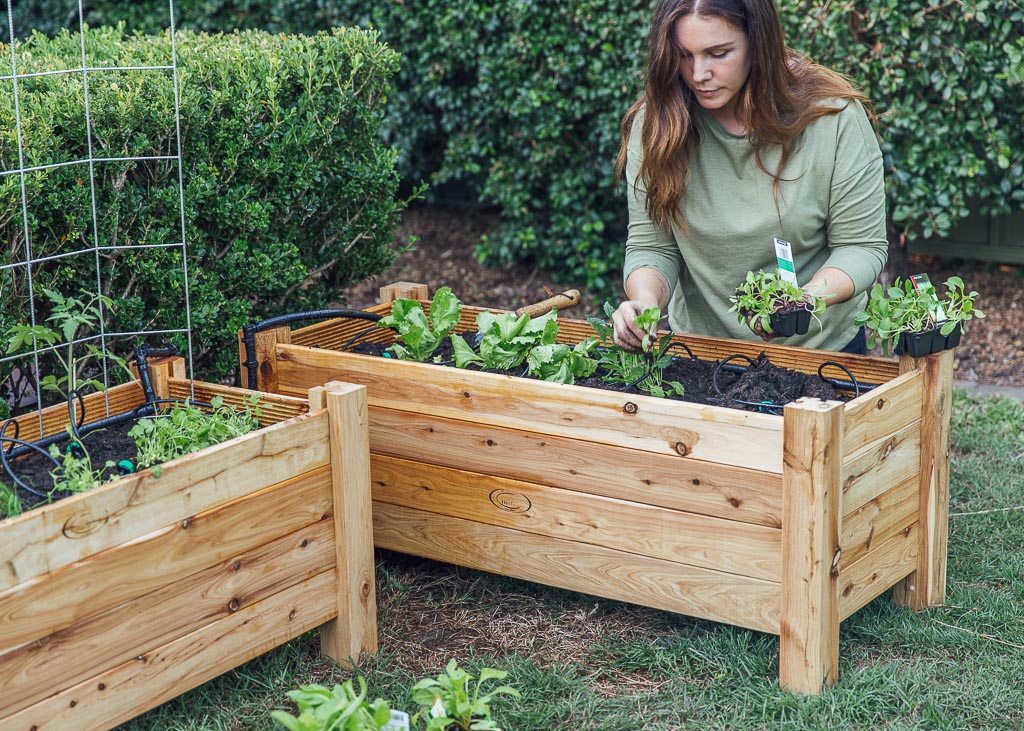
The Garden Beds
Herbs and vegetables need 6-8 hours of a full sun a day so I chose a warm sunny spot just off the front deck for easy access.
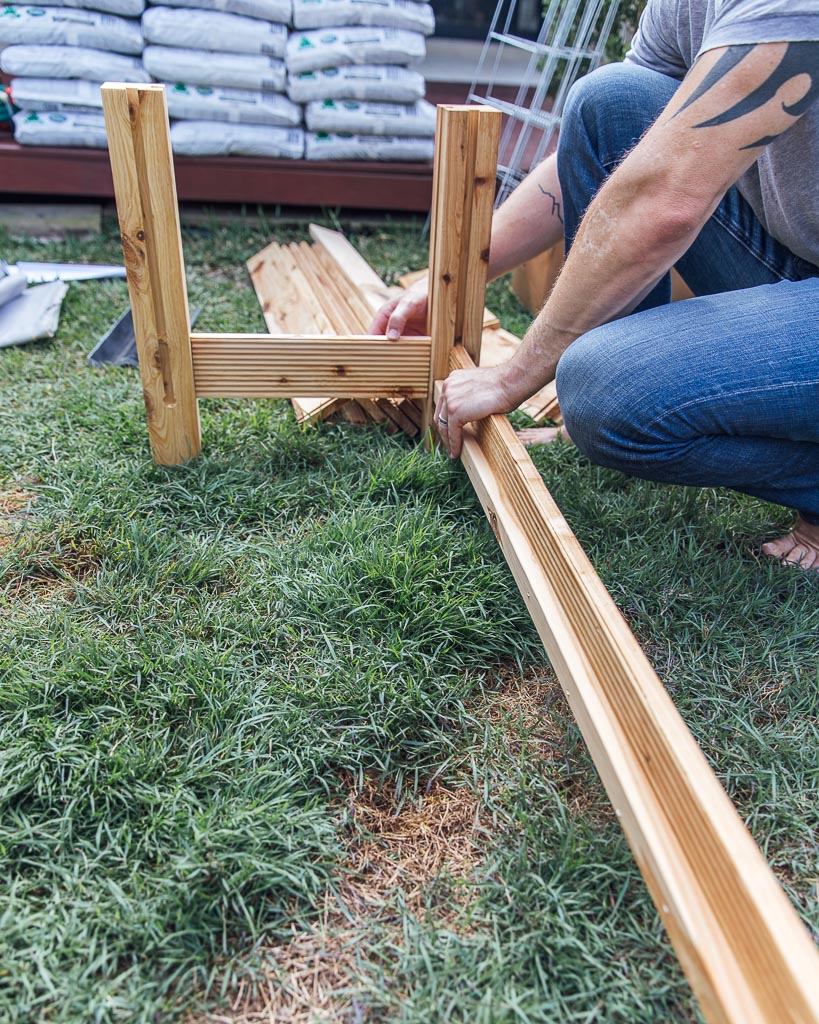
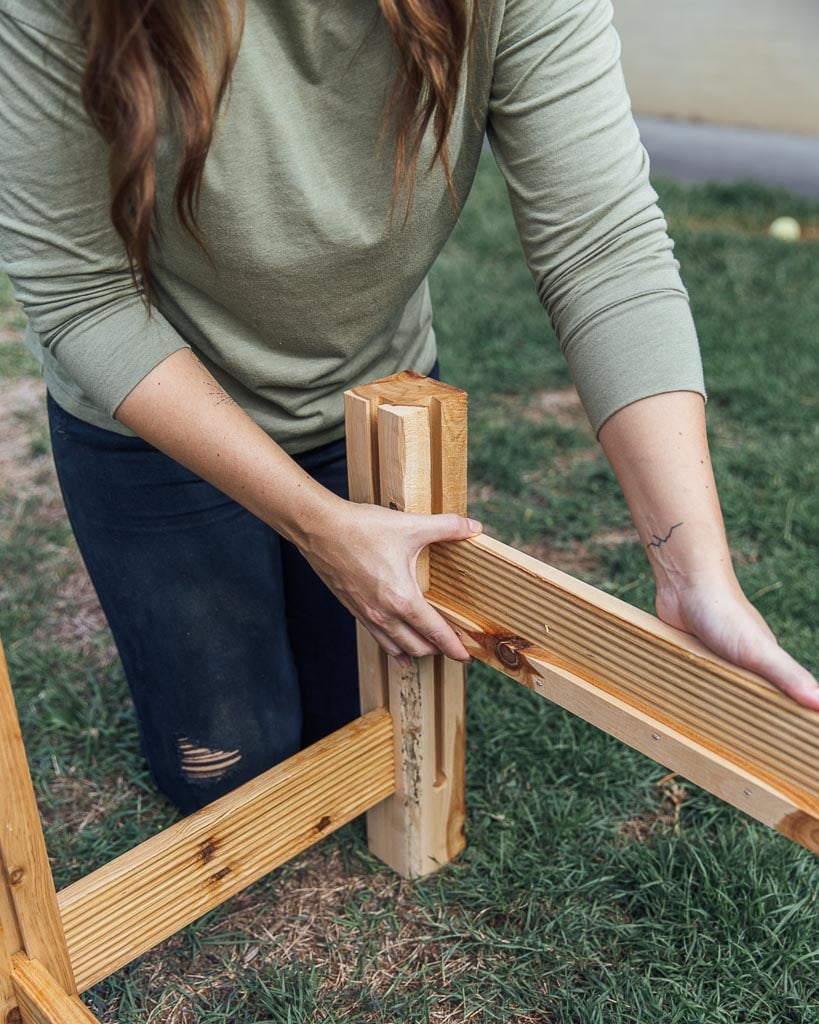
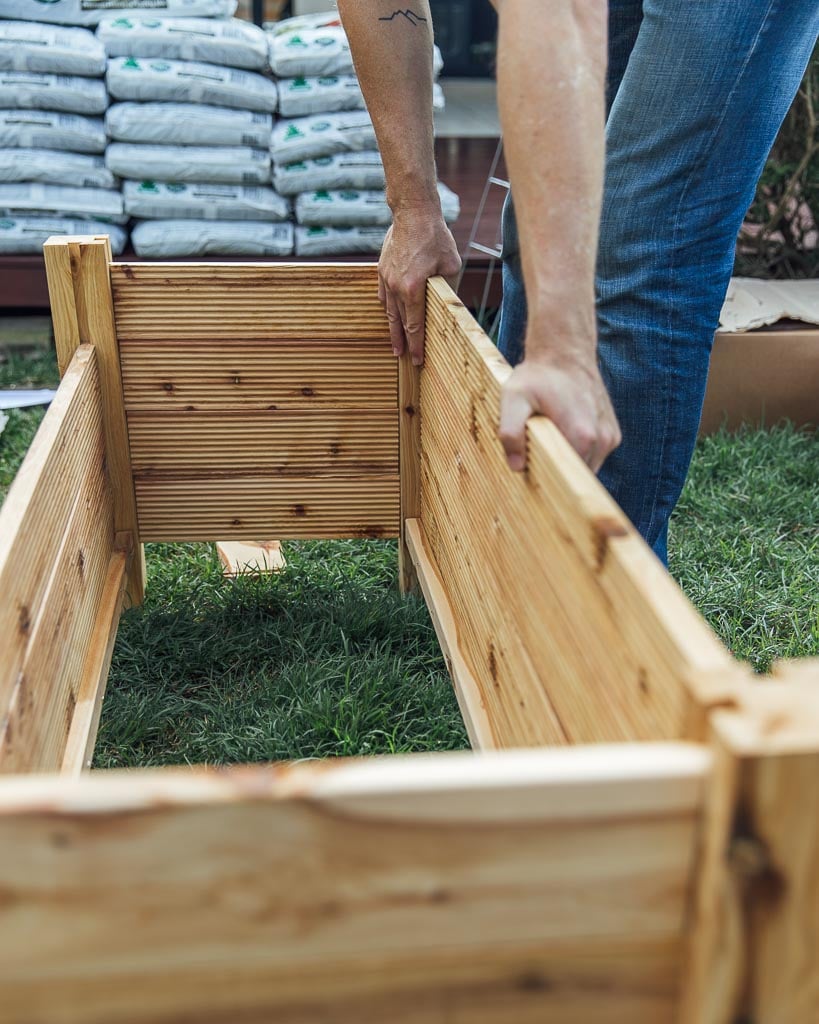
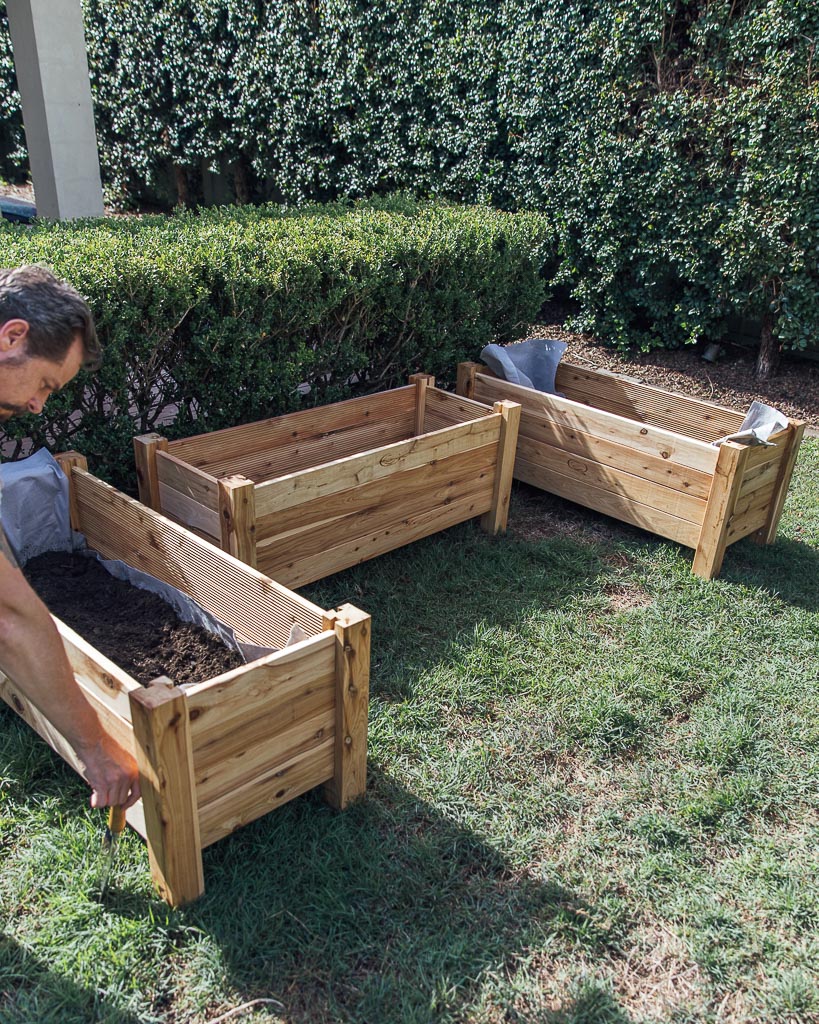
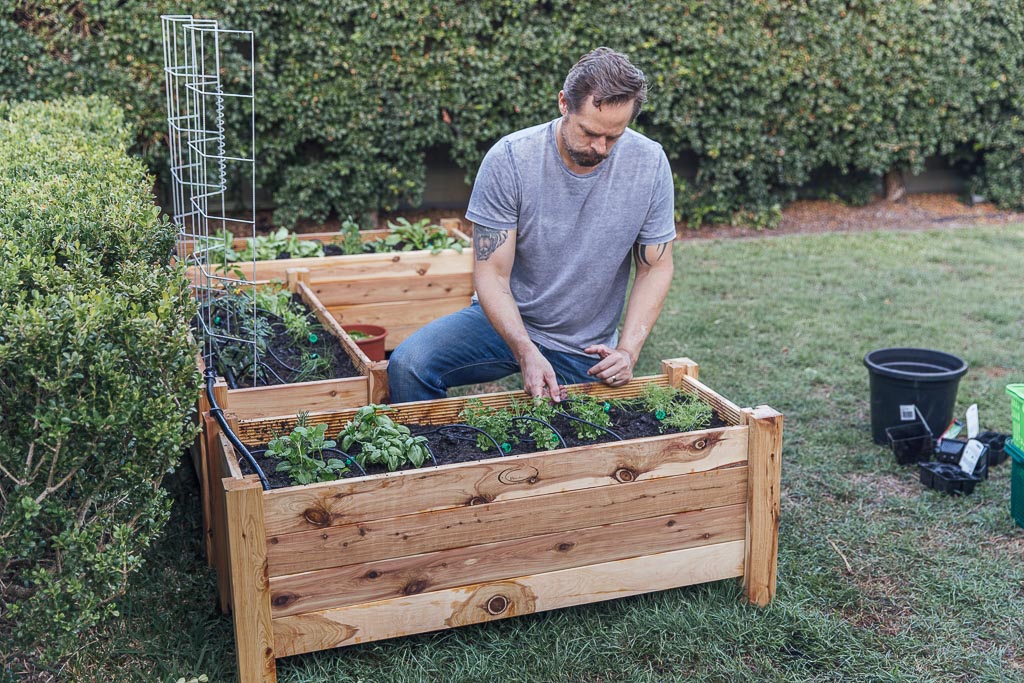
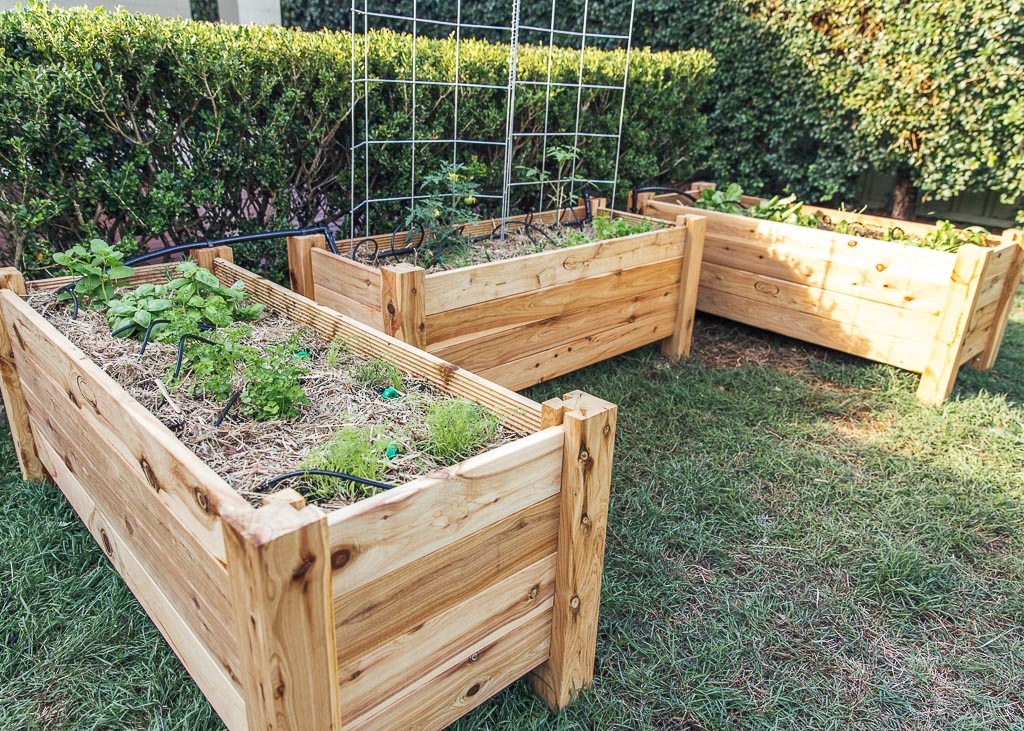
I chose these Birdies Heritage Elevated Timber Planters because they look lovely and the assembly is so easy, the parts just slot together, no drilling or screws needed.
Each bed took 6 minutes with two of us, they are 30kg so you might need some help to move them around. These beds are not available in-store, I ordered mine online and they took 10 days to arrive.
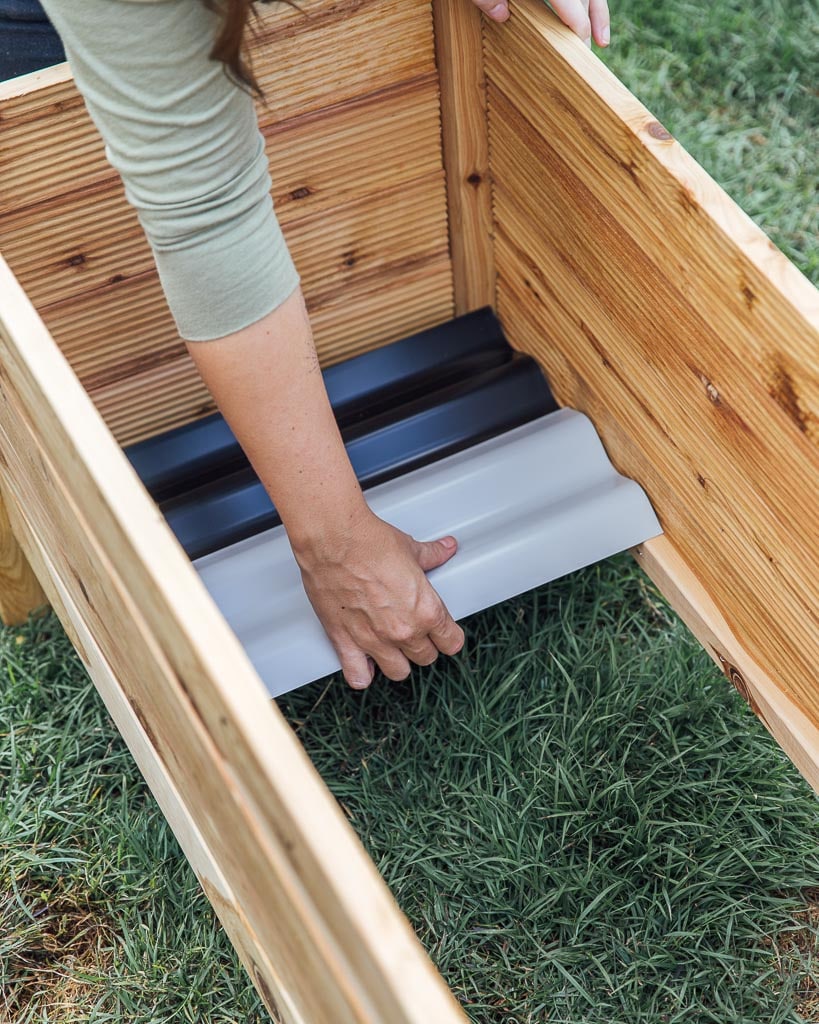
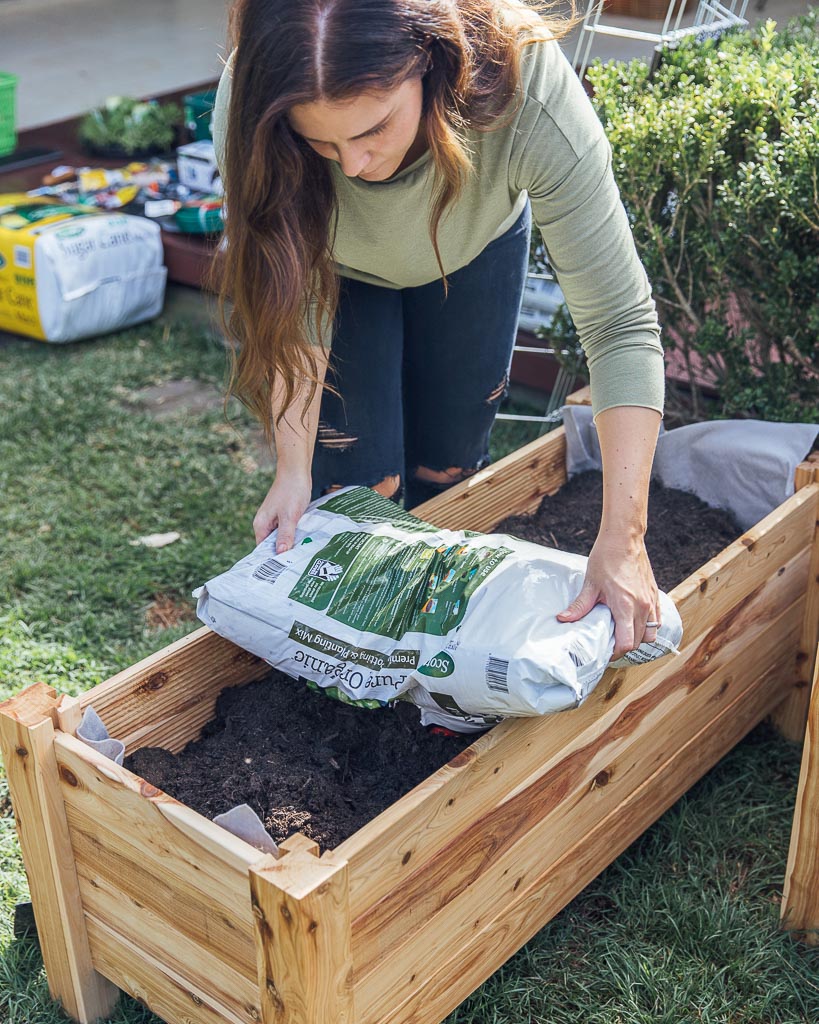
Choosing the Right Soil
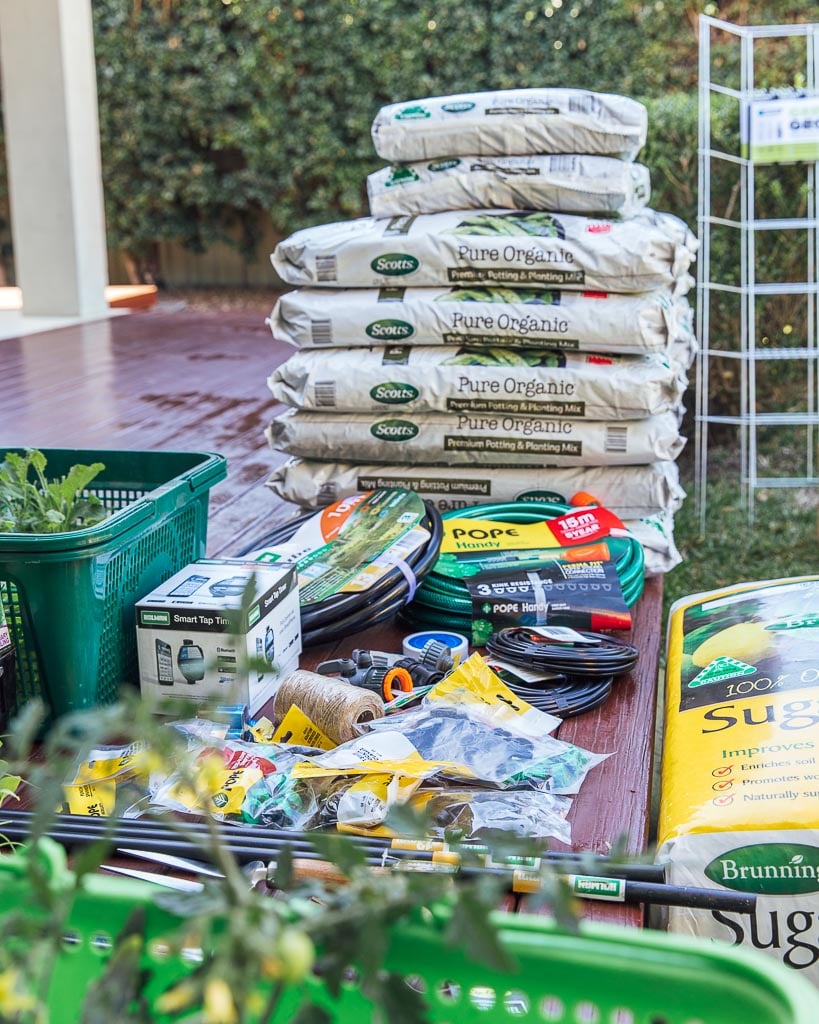
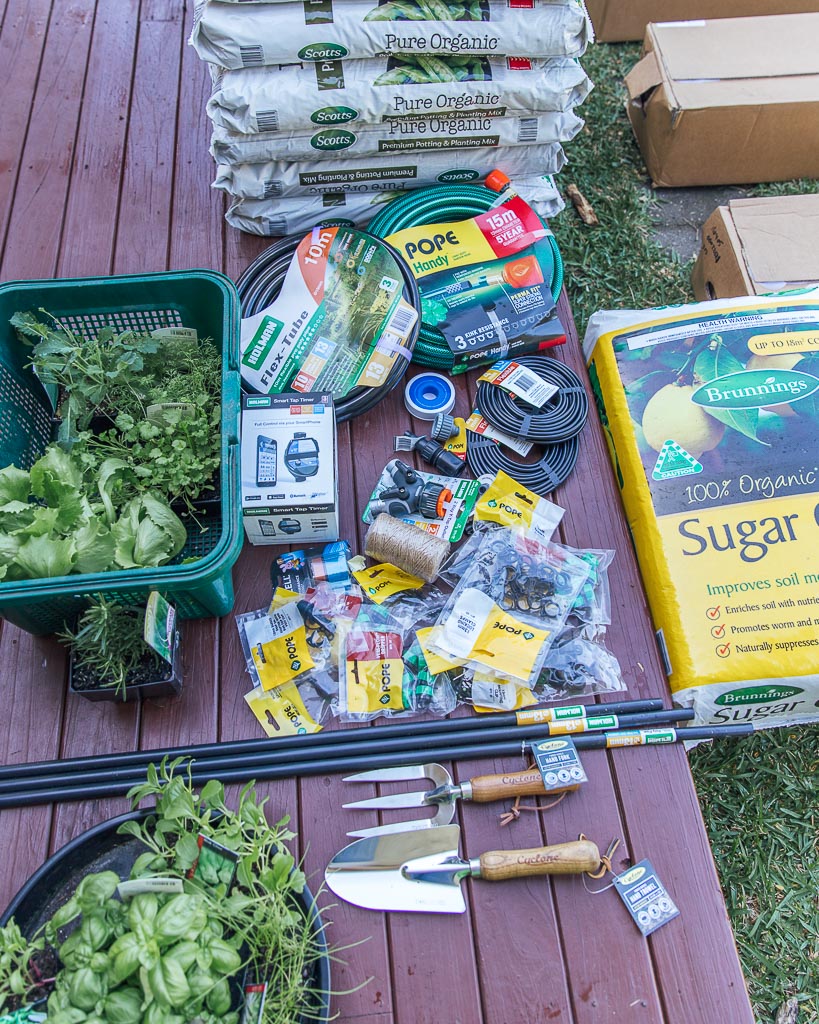
I went with Scotts Pure Organic soil – Potting and Planting Mix 25l – each bed took five bags.
I like this mix because its Australian Certified Organic with natural slow-release nutrients which makes it perfect for edible gardens. The soil is the most important part of your garden – healthy soil means better quality and better tasting plants.
Setting up the irrigation system
We did a DIY irrigation system.
Putting it all together was a bit fiddly with lots of parts, but it was very easy and with two of us divvying up the work, it took just under two hours (I was taking photos and filming during) so I would say this part will only take you about an hour to put together.
Step 1 –make the irrigation base
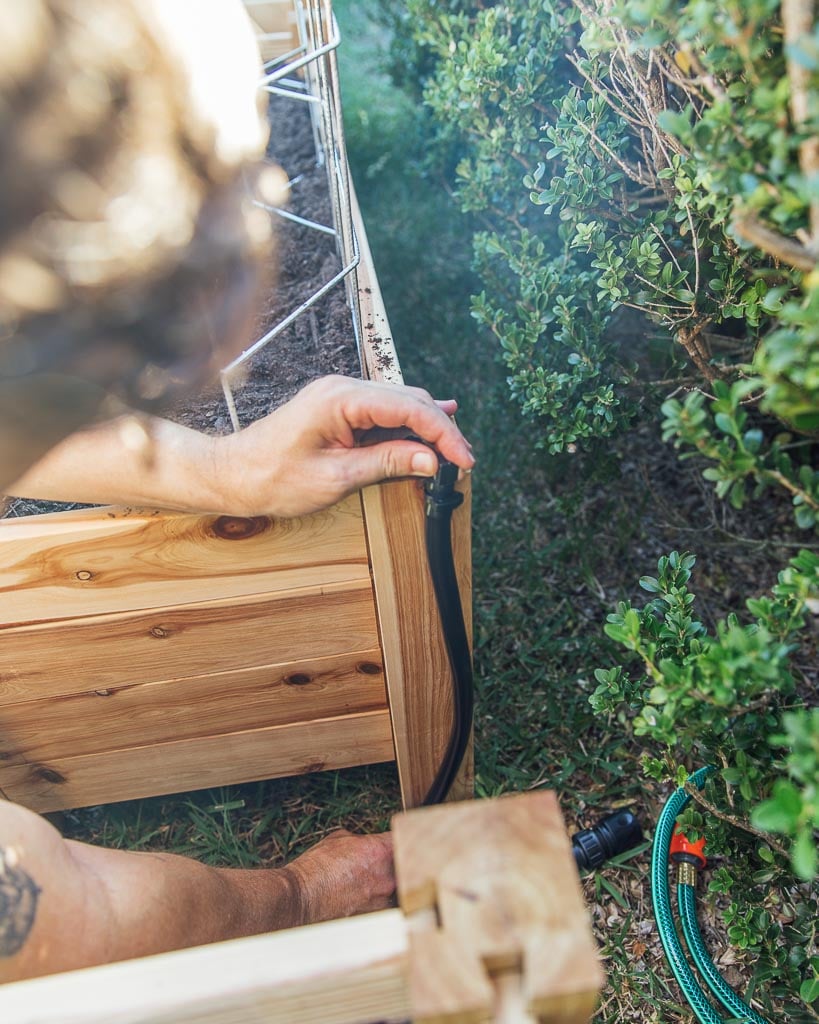
Run your hose from the tap to the beds. We used a Pope 12mm x 15m Handy Garden Hose.
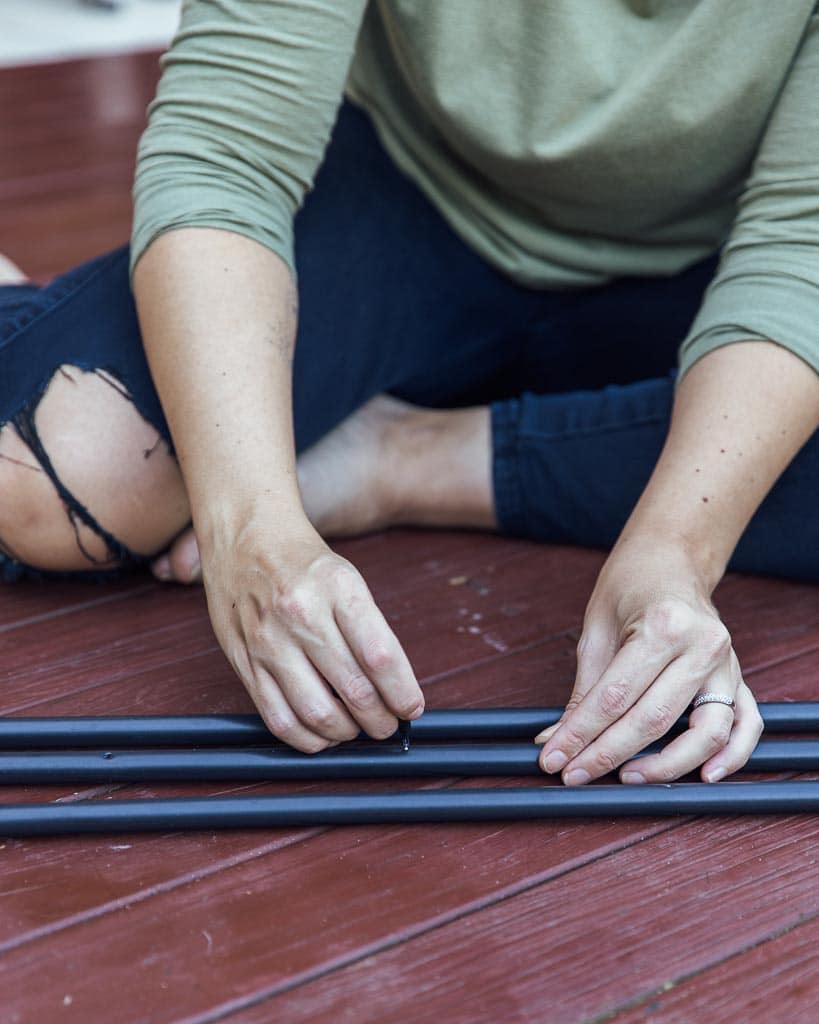
Next, we need to create a hose system to connect each of the beds to the garden hose. You’ll make this using 13mm x 10m flex tube and 13mm barbed snap-on poly clamp (these are your hose connectors) and 13mm barbed elbows (for the corners of the beds).
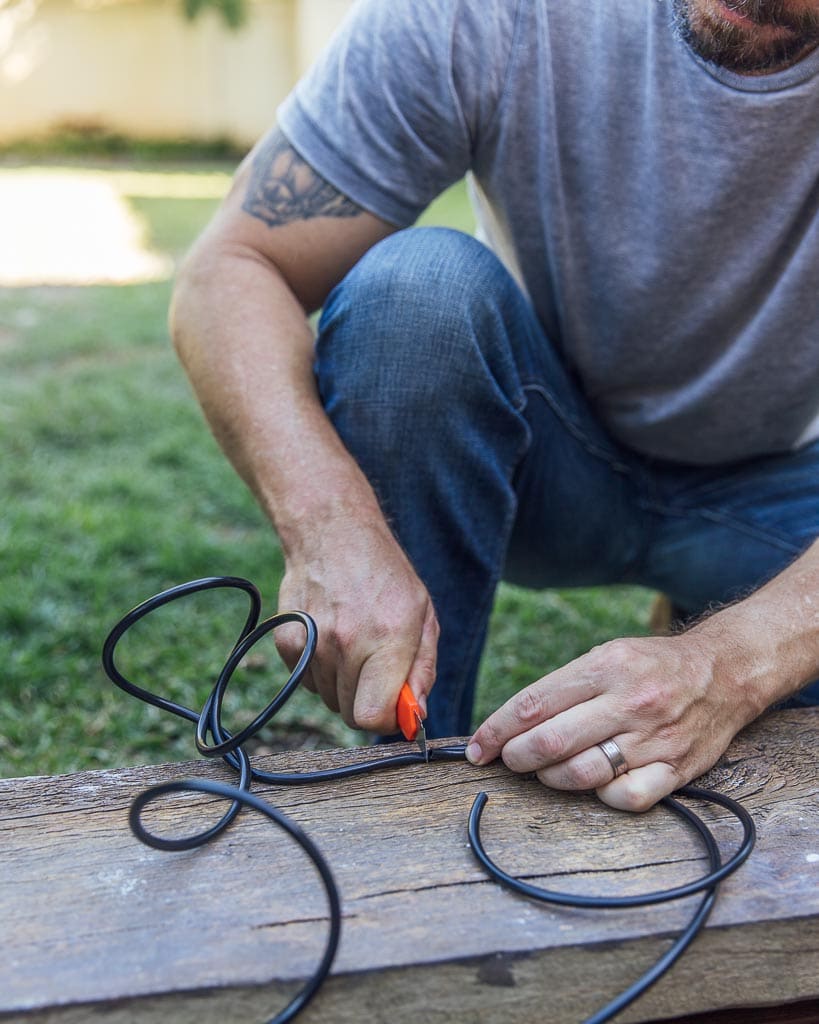
- Measure the height of the beds and the distance between each bed to see how much tube you’ll need and cut to size
- Connect each piece of flex tube with the poly clamps and elbows to suit your beds. Heating the flex tube by placing the ends in a bowl of boiled water will make it easier to slip in the connectors
- Run the connected flex tube along the back of each bed – pictures below
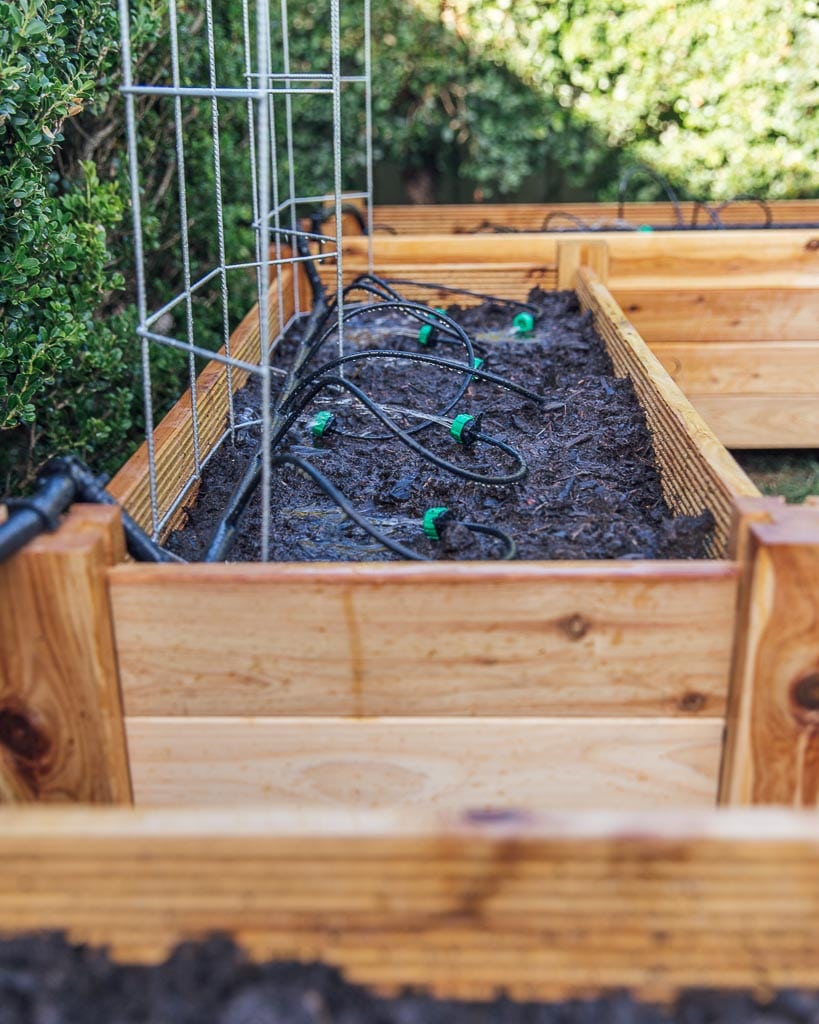
Step two – create the drippers
The drippers are what’s going to feed into your beds to water the base of the plants. These are perfect for above ground gardens like veggie patches and they save a lot of water when compared with hosing by hand.
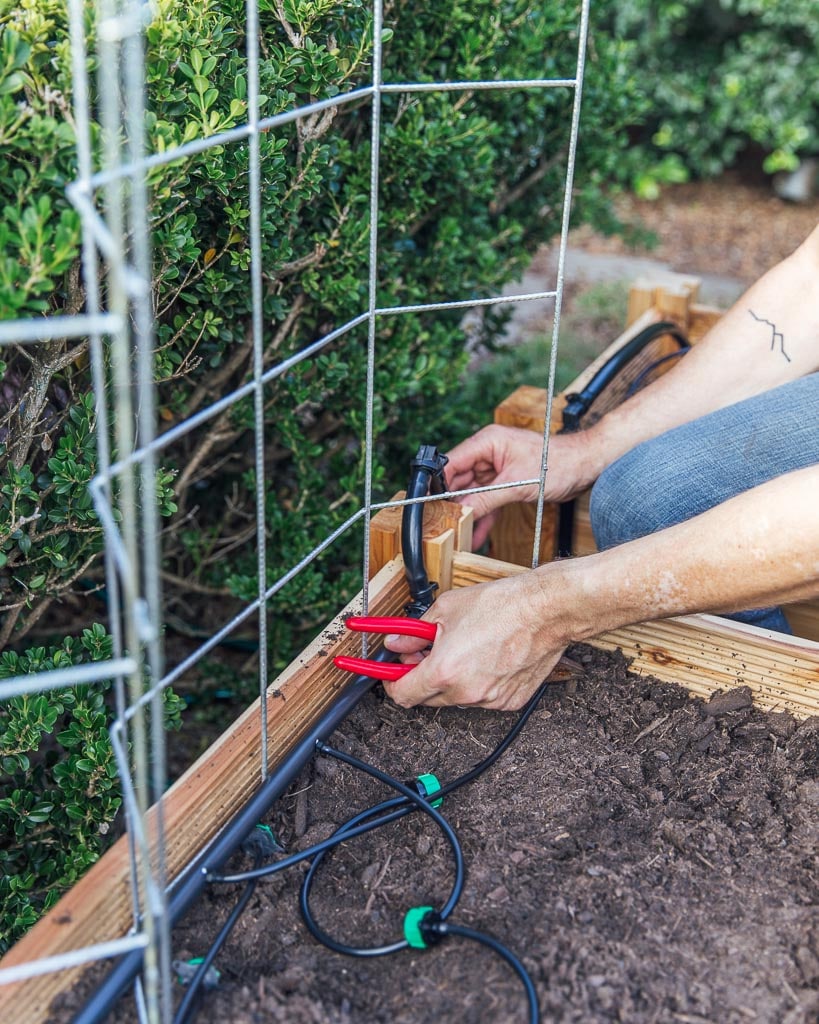
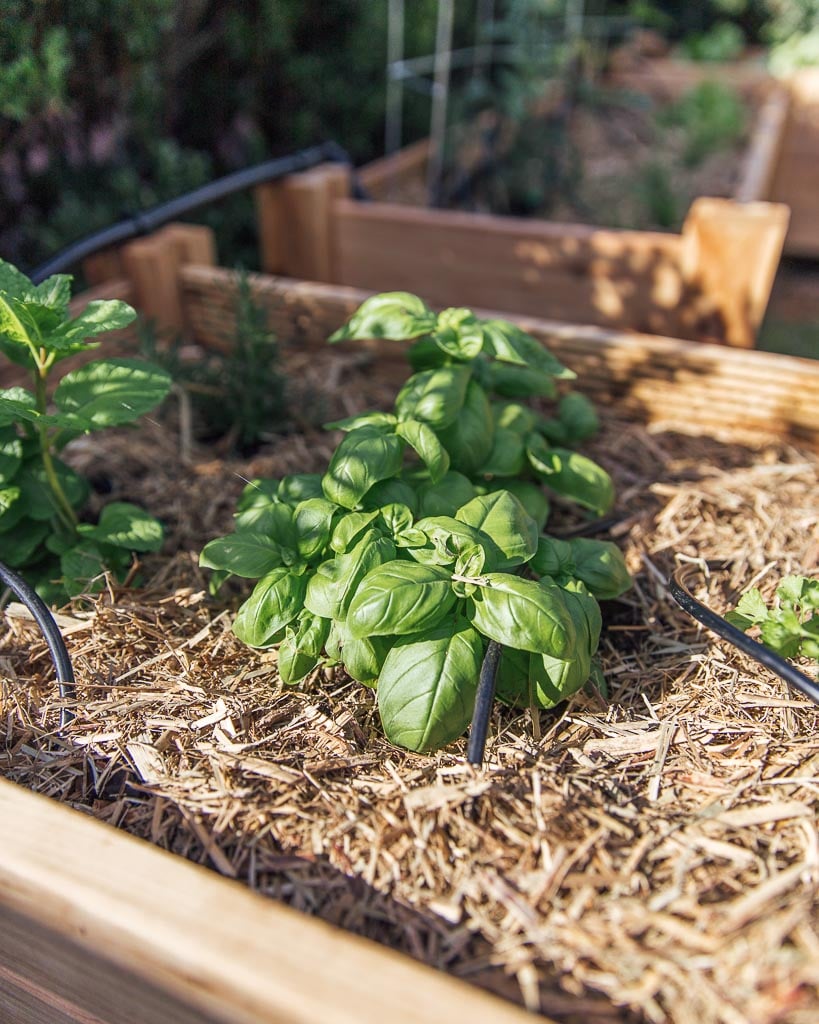
- Using a 4mm x 10m irrigation drip flex tube – we used two for three garden beds- measure the width of the bed and cut to size – we needed seven per bed – the flexibility means I can move them around the beds to the base of the plants so not water wasted
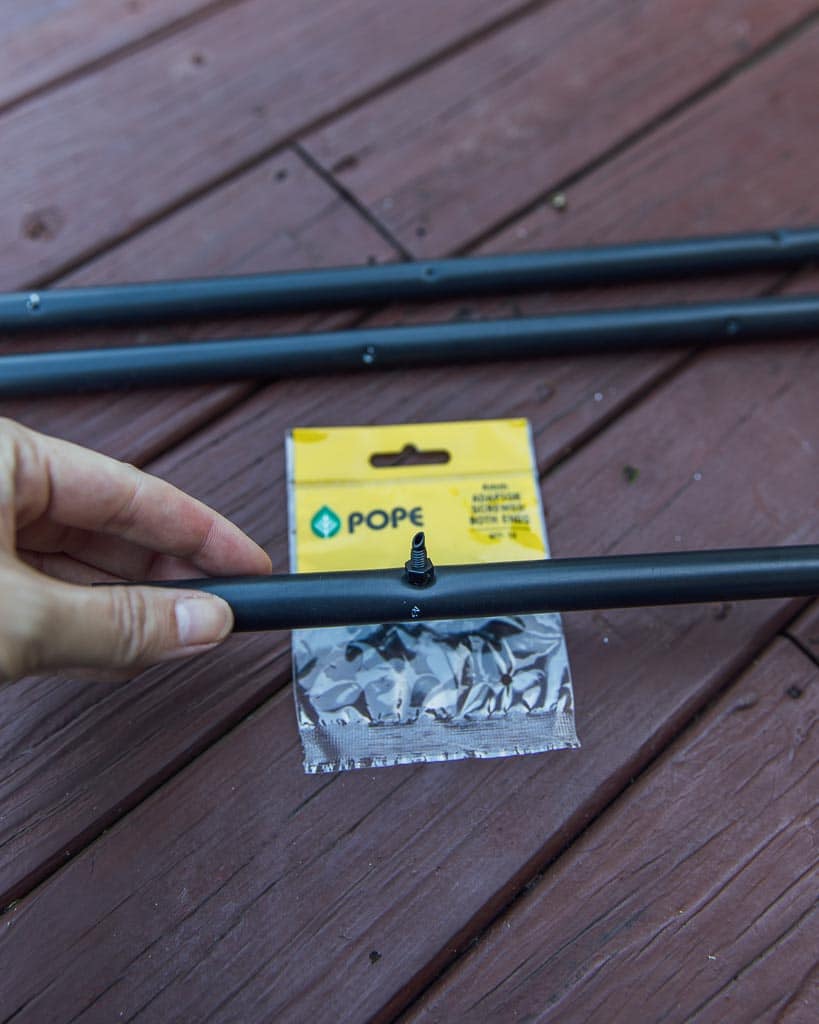
- Take this 13mm x 1m drip irrigation tube, (three, one per bed) measure how many drippers you want for the garden (we had seven) and punch holes along the length using the hole punch
- Place the 4mm adaptor screws in each of the holes
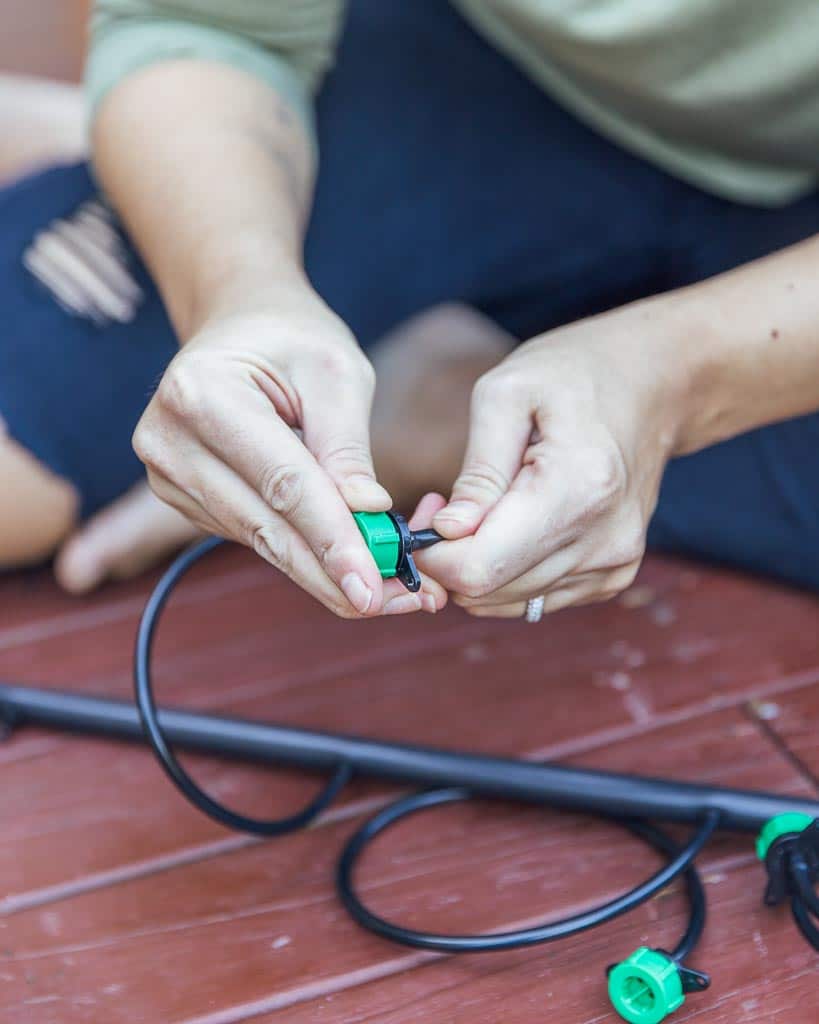
- Attach the measured and cut flex tube to each of the adaptors
- Attach the veriflow drippers to the end of the flex tube
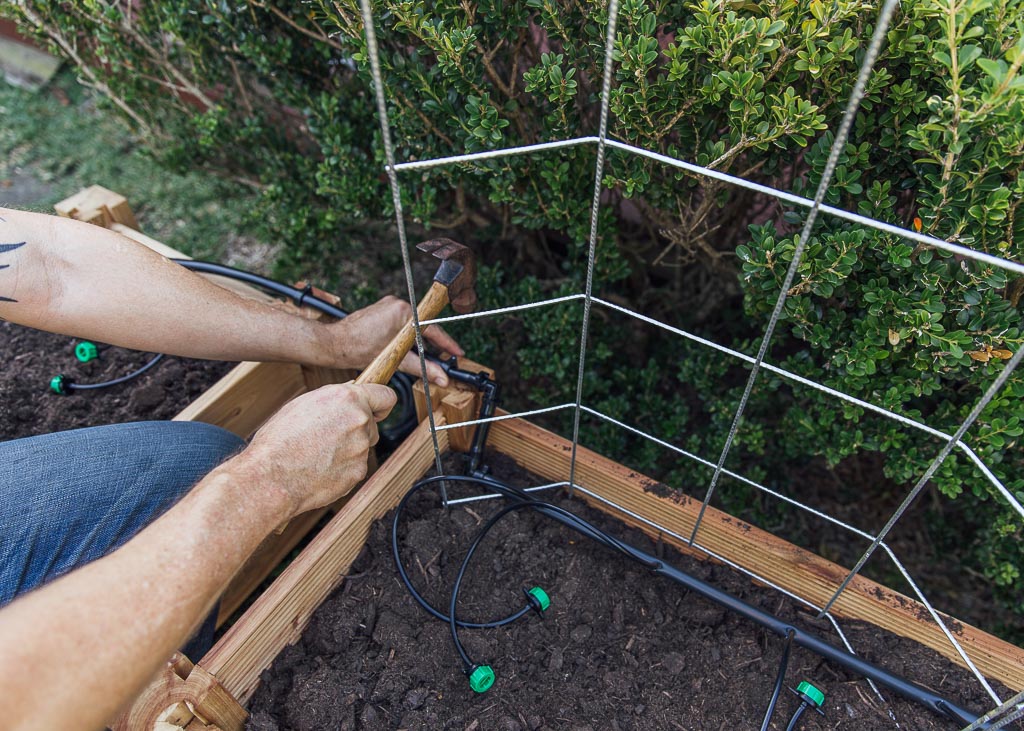
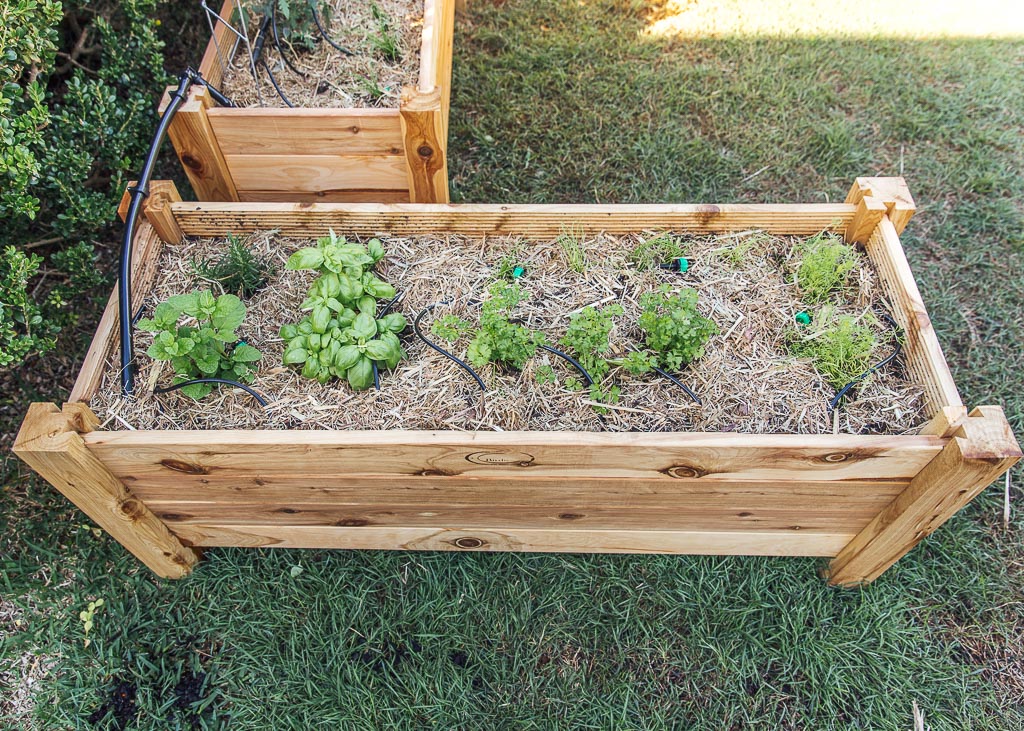
- Now take the three poly pipes with the drippers and lay them on the side of your garden beds – using poly clamps attach them to the irrigation base you created earlier
- Secure in place using 13mm mount clips hammered into the timber

Step three – automation
Water-saving is a priority, we live in Queensland where there are droughts and it’s hot most of the year-round. I don’t want to undo all my hard work by forgetting to water the plants, so we wanted a set and forget automated watering system.
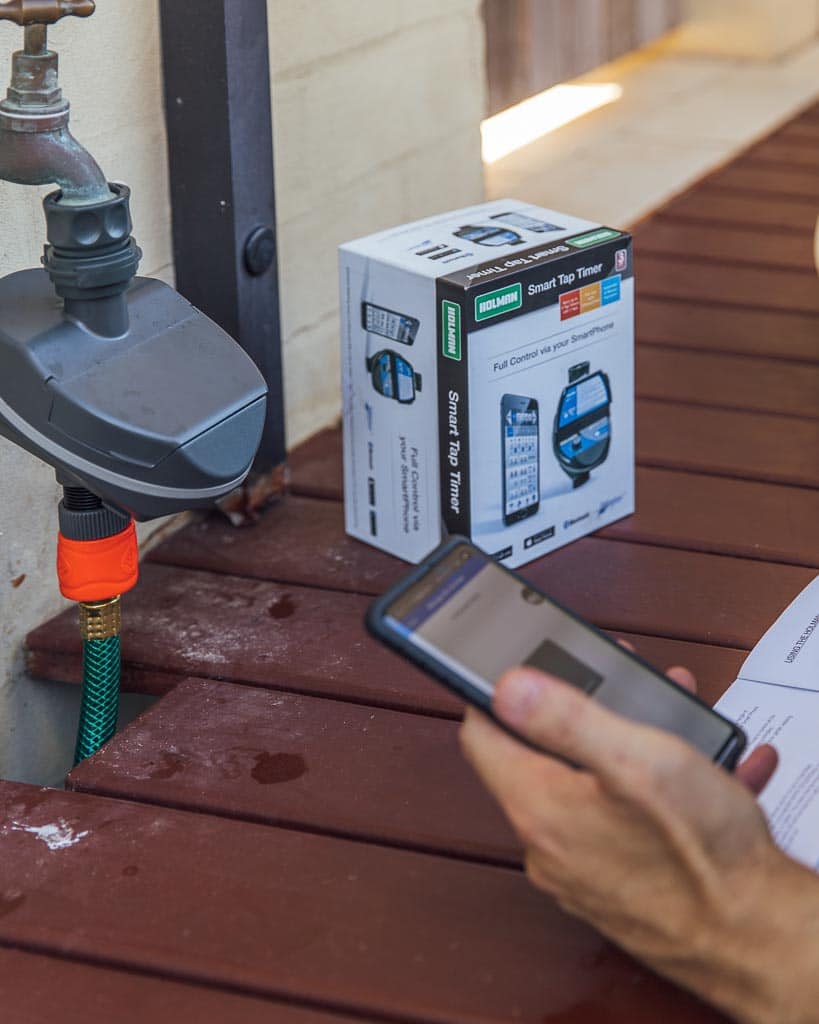
We went with the Holman Smart Tap Timer with Bluetooth.
After walking the length of two different Bunnings stores and not seeing the one we wanted on the shelves and ready to give up and try a different timer – Dave went up to the front counter to ask an unrelated question and saw the exact timer we wanted behind the counter. So, make sure you ask because they live behind the front counter!
I LOVE this Smart Tap Timer.
It connects to an app on your phone and it’s so easy to set up – pop a battery in the back, download the Holman Water app (available on Google and Apple), turn on your phone’s Bluetooth and set the days you’d like to water your garden, the watering run times, and the start times in 24-hour format. If you have a larger garden you can set multizones and have watering times up to three times a day.

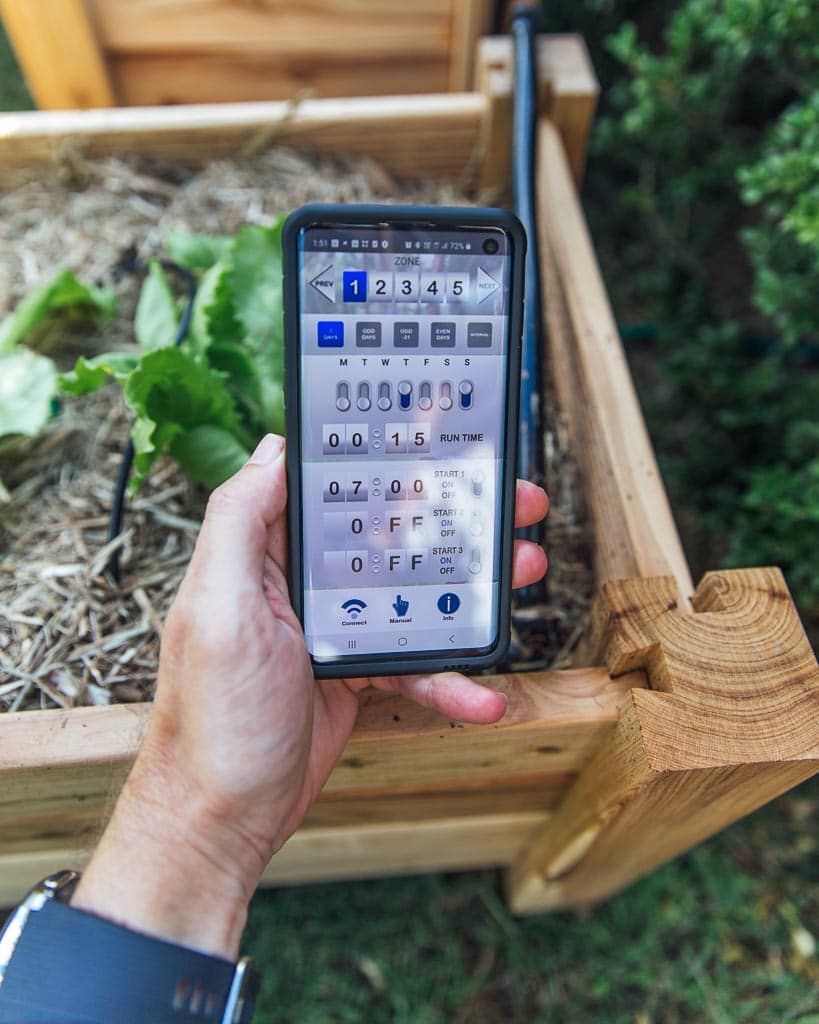
Lastly, test the waster system and make sure it’s all working. Adjust the trickled by turning the green part to control the water flow. And that’s it. Your irrigation system is done!
The plants
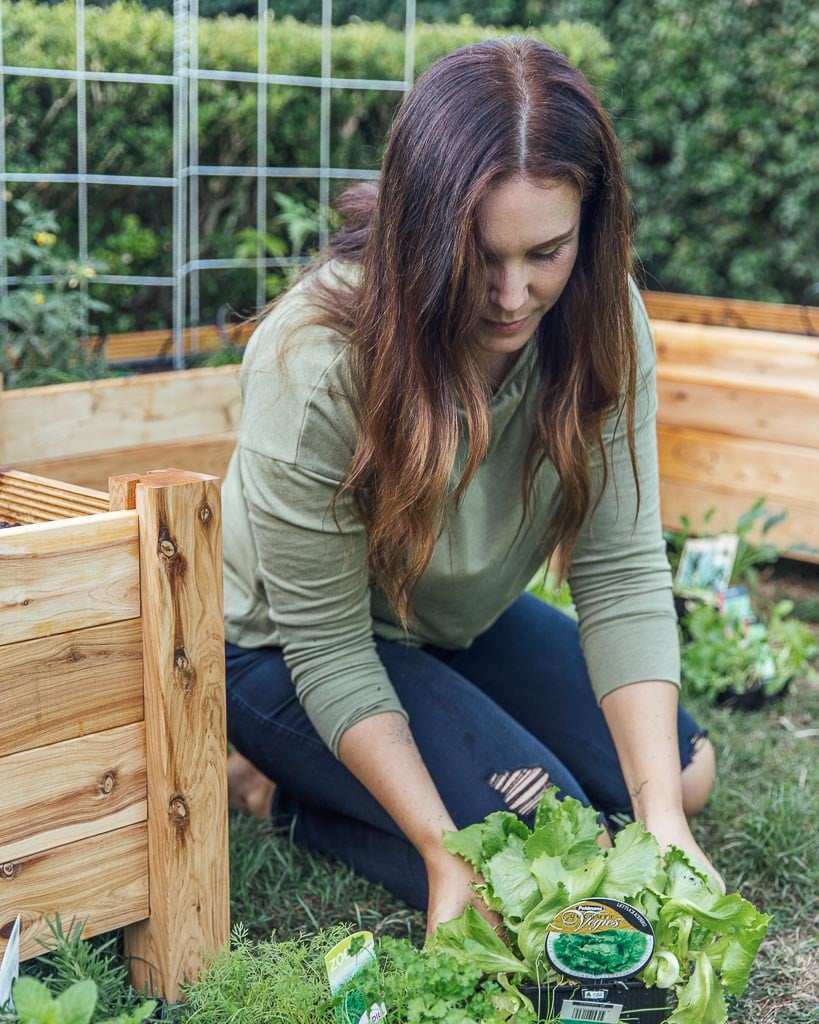
Sticking with the idea of growing only what we’ll eat to avoid food waste I chose high yielding plants like herbs and salad veggies.
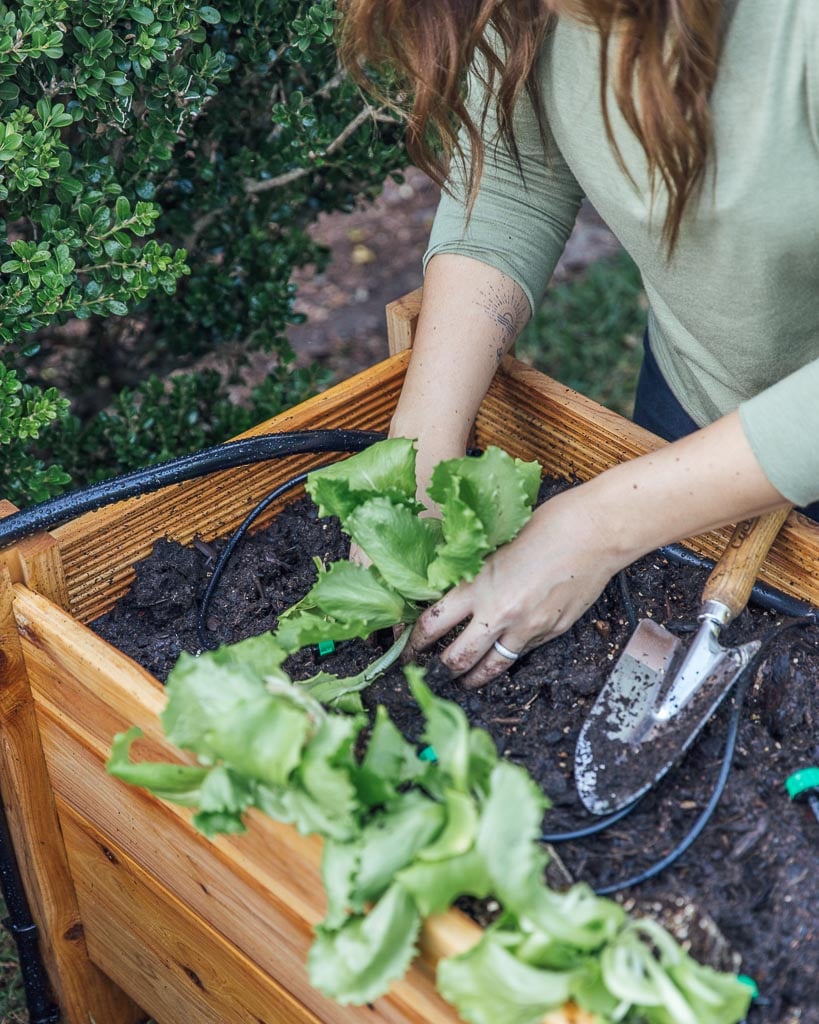
In bed one we have leafy greens – baby spinach, bok choy, kale, and iceberg lettuce.
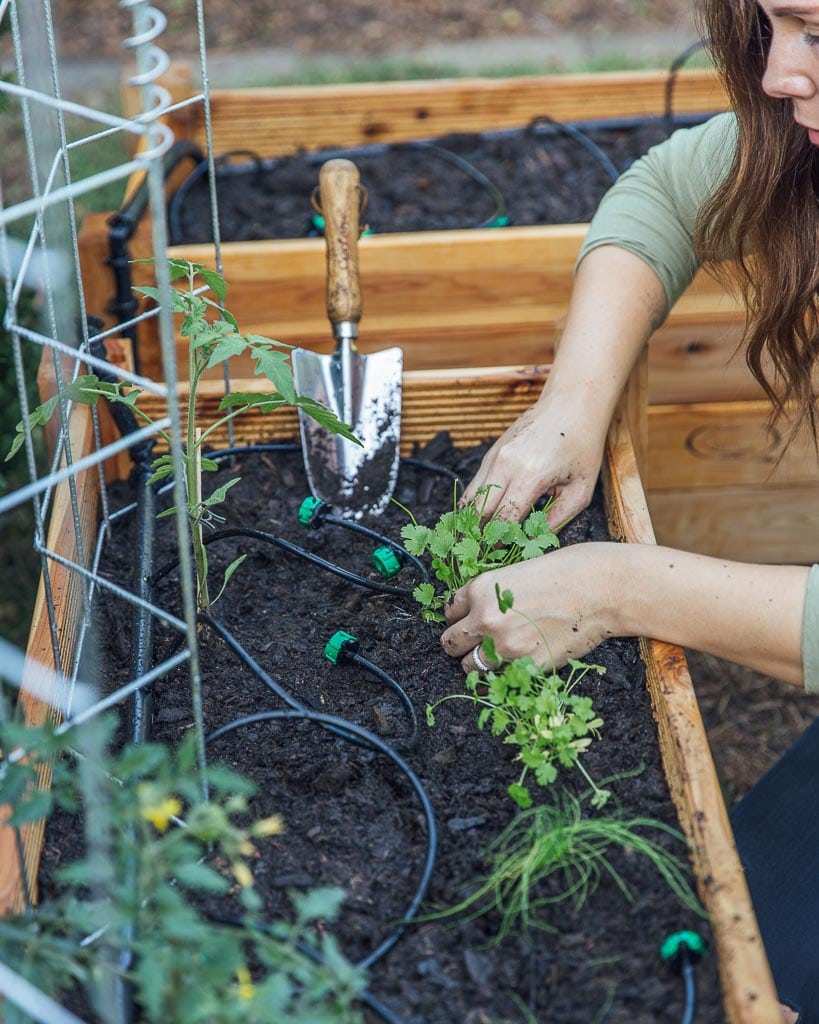
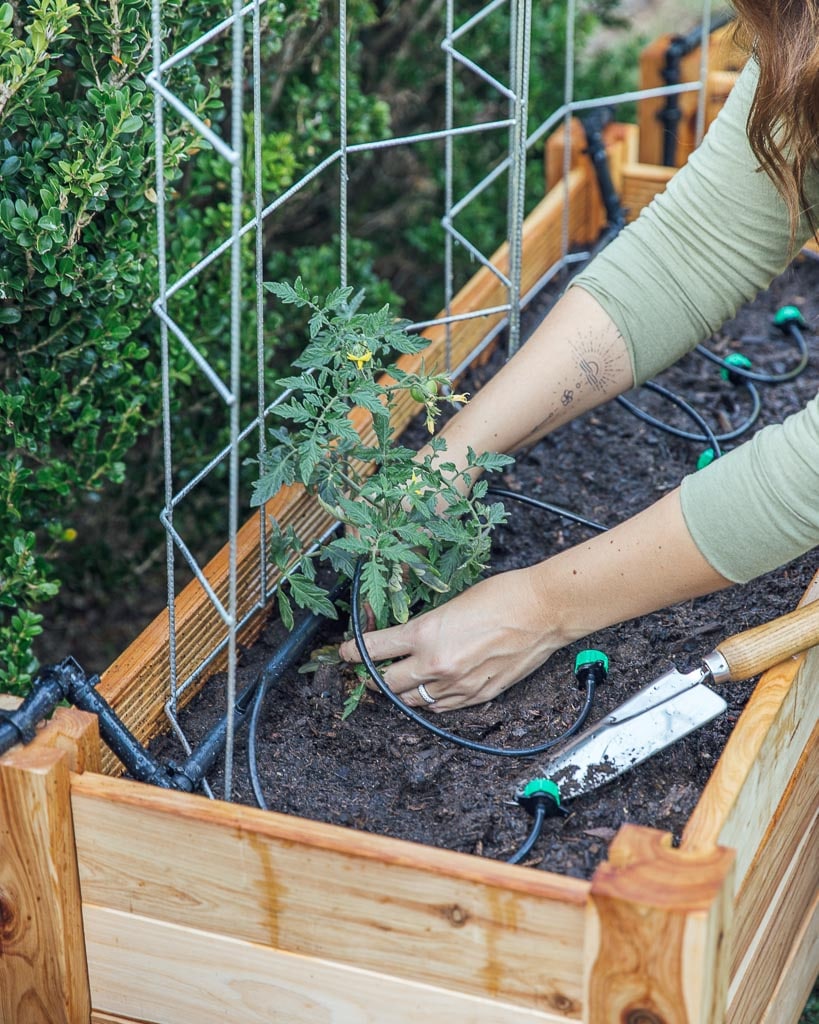
Bed two has two tomato plants – tigrella cherry and an heirloom variety I forgot which type but it will be a nice surprise! We’ve used the Whites Grip & Grow Trellis so the tomatoes have strong support and plenty of space to climb. Because the front of this bed sees more shade I chose two herbs for the front that can tolerate a little less sun, chives and coriander
Bed three is the herb garden. I don’t use much rosemary in cooking but bees love it, there’s also mint, parsley, spring onion, basil, and dill.


Don’t forget to add Mulch
Topped off with organic Sugar Cane Mulch which helps keep the soil moist so you can use less water. The mulch also helps enrich the soil with nutrients and promotes worm and microbial activity – microorganisms digest the organic matter and provided more nutrients to the plants – which are key contributors to healthy soil and plants.
Finally, adjust the drippers so they sit near the base of the plants to make sure you don’t waste any water.

Time & Cost
Between the planning, making the wishlist, two trips to Bunnings (I did forget one or two things!), and putting the garden together, it’s about one to two days work.
- Planning and research for the garden and irrigation – 2-3 hours
- Two trips to Bunning with the inevitable extra time spent in the green section browsing because I always need more houseplants – 3 hours
- Assembling the garden beds – 20 minutes
- Adding the soil – 20 minutes
- Creating the irrigation setup – 1-2 hours
- Planting and mulching – 30 minutes
The total cost came to $1370 with the biggest expenses being the raised beds and the potting mix.
- The beds were $582 for three – it’s worth noting that there are lot’s of different garden bed options at different price points available or you can pick up some timber and go down the DIY route to save money
- Organic potting mix $279 – we needed five bags per bed and had two bags leftover
- Holman Bluetooth Timer – $107 – timers range from $15 all the way to $250 so you have options to suit your budget
- Irrigation setup – $181 – this included all the hoses, clips, clamps, connectors, pipes and drippers
- Plants – $85 – I used seedlings because I’m impatient but growing from seeds will save you money
- Miscellaneous – garden tools, stakes, plant trainers, pots – $136
Final notes
And that’s it. My DIY veggie garden.
This was chosen to suit our lifestyle and yard but there are lots of different options to suit your space whether you live in an apartment or want a small scale farm in your backyard.
I really enjoyed the process of planning and researching. Chatting to people in the Bunnings garden center to find out what options were available was a big help. It’s only been two days and I keep finding myself popping outside to see if the plants have grown any bigger! I feel like this is going to very rewarding as well as saving some money and plastic.
Check out my Instagram Stories saved under highlight ‘Veggie Garden’ to watch the step by step setup and that’s where I’ll post progress reports, so follow along to see how we go!